 Connect to Research Drive with Cyberduck
Overview
This is the Connect to Research Drive with Cyberduck manual, part of Manuals in the A-LIFE RDM GEMs collection.
This document covers how to connect to your Research Drive project space using Cyberduck via WebDAV and transfer data.
Supporting materials: Transferring Data in Research Drive
Authors: Irene Martorelli, Brett Olivier — Last modification: 2026-08-02 — Version: 0.2.0
 Description
Cyberduck is a free desktop client (Windows and macOS) that connects to Research Drive via WebDAV, allowing you to upload, download, and manage your files with a simple drag-and-drop interface.
Before you start
You need to have access to a Research Drive project space before you can transfer data. If you do not have access yet, make sure to first request storage space or ask the Research Drive project owner to grant you access.
For more information on how to get started with Research Drive, see our supportive steps in the Getting Started with Research Drive.
 Steps for Connecting to Research Drive with Cyberduck
1. Download Cyberduck
- Download Cyberduck from https://cyberduck.io/download/ (Windows and macOS).
2. Sign in to Research Drive
- Go to: https://vu.data.surfsara.nl
- Sign in using your VU credentials.
3. Generate a WebDAV access token
- In Research Drive, open your Personal Settings and navigate to Security
(or use this direct link: Security Settings).
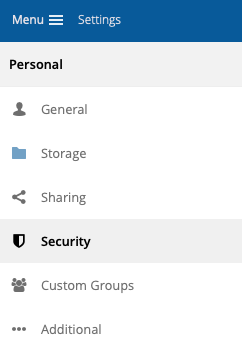
- Scroll to App passwords / tokens.
- Enter a name for your token (e.g.
Cyberduck) and click Create new app passcode.

4. Save your credentials
- Copy and save the generated username and password somewhere safe — they cannot be retrieved again.
- Also note the WebDAV URL:
https://vu.data.surfsara.nl/remote.php/webdav/
What are WebDAV credentials?
It is possible to access your Research Drive space as a network drive on your PC, laptop, or mobile device. Clients other than the native web interface — such as Cyberduck — need additional credentials to connect. These usernames and passwords are called WebDAV credentials.
 Check out How to get your WebDAV credentials (SURF Servicedesk Wiki) for more details.
5. Open Cyberduck and add a new bookmark
- Click the Bookmarks icon in Cyberduck.
- Click the + button to add a new bookmark.
6. Choose WebDAV (HTTPS) as the connection type
- Select WebDAV (HTTPS) from the protocol dropdown list.
7. Fill in the connection details
- Server:
vu.data.surfsara.nl - Path:
/remote.php/webdav/ - Username: the username generated in Step 3
- Password: the password generated in Step 3
8. Close the bookmark window and connect
- Click
Xto return to the main Cyberduck home window. - Click your new bookmark to connect and access your Research Drive project folders.
9. Manage your project directory
- Drag and drop files and folders from your laptop to your Research Drive project space.
- A transfer window stays open until the full transfer is complete.
- You can also drag files from Research Drive back to your laptop the same way.
Useful Information
WebDAV credentials expire
Your WebDAV access token may expire after a fixed period. If you lose access, repeat Steps 3–4 to generate and update your token.
Further reading
See the SURF documentation — Access Research Drive via Cyberduck for more details.